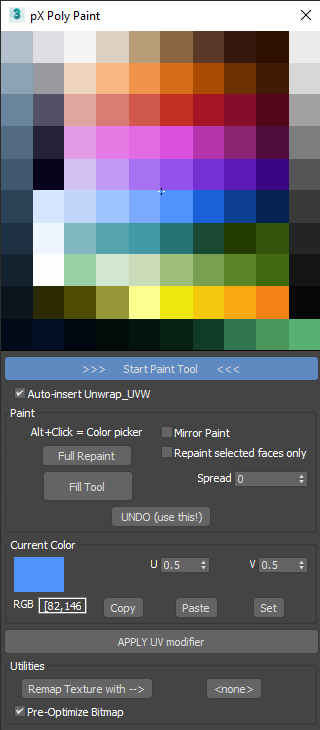
pX Poly Paint is a 3Ds Max script I felt the need to develop when I started creating #LowPoly style models. They are based on a fundamental principle: each face will have a single flat color from a texture pixel.
Then, we don’t need to make traditional UV Mapping, just map all the vertices of each polygon to a pixel in the texture because I want to use a texture, not a different material for each color. So after some fun work with MAXScript there it is.
Watch the demonstration video:
Right-click here to Download the script or see it on Github here.
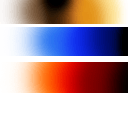
This helps to make the UV Mapping + Texturing much quicker, and the size of the textures can be very small because they will act now as a color palette and you can even share the same tiny texture with many 3D models. The model featured in this post uses this 128x128px texture:
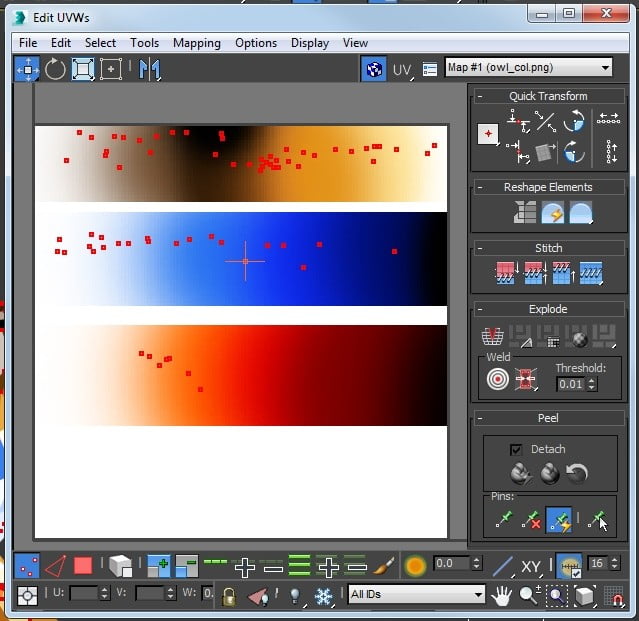
The UV Mapping looks like this, where dots are faces with all their vertices sharing the same pixel:
I think adopting this style and using the polygon painting tool is good for low budget game development, especially for mobile games. Besides the low texture sizes, the other advantage is that since faces are filled with flat colors you will never see texture pixelation and your low poly style 3D models will look nice on any high definition display.
Tool help
Installation/Testing: Run the macro script PolyPaint.ms, and find it under ‘pX Tools’ category as ‘Poly UV Painter’ when customizing your menus. (Or comment/disable first line on the code starting with macroScript before running it if you only want to try it without installing)
Requisites: The object to paint has to be an Editable Poly with applied material with a diffused bitmap.
– With the object selected click ‘Start Paint Tool’. It will display the texture on the window and prepare the model for the painting.
- Click on the image to select a texel color and paint over the 3D object.
- Check ‘Mirror Paint’ to paint mirrored along the X-axis if your model is symmetrical.
- ‘Spread’ value allows to increase the size of the “brush”.
- ‘Full Repaint’ to repaint the whole object or selected faces with the current color.
- ‘Fill Area’ performs a flood fill algorithm on the polygons. (This was cool to implement).
- ‘Undo’ to undo operation made by this tool. Standard Max Undo will not work.
- Use Copy, Paste, Set buttons to copy, paste and set UV coords from clipboard.
- ‘APPLY UV modifier’ collapses the stack to the Unwrap_UVW position, applying the UVs to the Editable_poly.
- ‘Remap Texture with –>’ This allows you to replace the model texture while keeping as close as possible the current paint. For this the tool will analyze the polygon colors and find the most similar on the new bitmap provided.
Keyboard shortcuts:
- Alt+click: Pick the color right directly from the 3D object!
- Ctrl+click: Use fill tool.
- Shift+(hold click while dragging across an edge): Paint across the faces loop.
- Ctrl+Alt+click: Undo last painting stroke.
Still here!? Well then you deserve the bonus stuff:
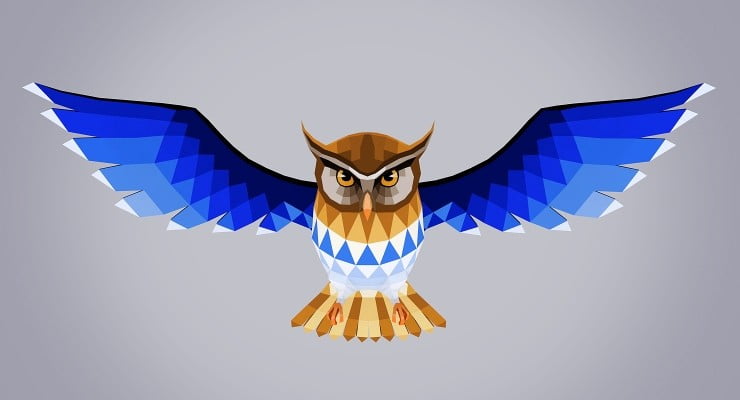
Download the cute Lowpoly Owl for free here! (Use CC License)
Enjoy!